|
|
Post by dacota25d on Feb 25, 2015 22:16:55 GMT -6
|
|
|
|
Post by dacota25d on Feb 25, 2015 22:28:08 GMT -6
|
|
|
|
Post by magnumed on Feb 28, 2015 5:00:31 GMT -6
Keep posting, like to see more.....
|
|
|
|
Post by ruppeagle on Feb 28, 2015 6:54:52 GMT -6
Dacota25D Beside hard work what did you use to get the tunnel that shiny? I agree with Magnumed post more pics.
|
|
|
|
Post by dacota25d on Feb 28, 2015 11:13:52 GMT -6
I used zephyr rouge bars and wheels to do it then finished it with bushes polish and it came out good but next time I do one I'll be truing a different method
|
|
|
|
Post by dankubista on Feb 28, 2015 21:34:24 GMT -6
Wet sanding will give you the best results on a tunnel. As scary as it sounds, don't be afraid to start with 180 if needed. My tunnel was severely pitted so i started with 180 wet block sanding. Then 220, 320, 400, 600, 800, 1000. Always use a block on flat surfaces and lots of water. Beer helps get through it all. It's a real long process but worth it.
At that point, the polishing part is the easiest of the entire job. I used mothers on a wizards buffing kit that comes with a wool pad and 2 foam pads (using a drill lol) which will take out the scratches from 1000. Then hand buff with mothers with the blue shop towels, they surprisingly work the great!
|
|
|
|
Post by dacota25d on Feb 28, 2015 21:40:58 GMT -6
Yea this tunnel was a process we started 220-800 with DA then 180-2500 wet sand but it was just to pitted in some spots. And the machine polish didn't work as well as I hoped it would it left a lot of haze and fine scratches that wouldn't buff out by hand. Next time I will be trying the wool pad way like you did and see how I like it
|
|
|
|
Post by dankubista on Feb 28, 2015 22:00:56 GMT -6
I couldn't get all of the pitting out of mine either. I could of but there wouldn't have been any metal left lol. This stuff is really old, seen lots of abuse and all a person can do is just try their best. The only tunnels that ever come out perfect were either brand new or painted from the factory.
|
|
|
|
Post by dacota25d on Feb 28, 2015 22:37:08 GMT -6
|
|
|
|
Post by dacota25d on Mar 2, 2015 21:11:39 GMT -6
|
|
|
|
Post by dacota25d on Mar 2, 2015 21:25:01 GMT -6
|
|
|
|
Post by Ruppsforever on Mar 2, 2015 21:46:58 GMT -6
damn NICE !!!
|
|
|
|
Post by magnumed on Mar 3, 2015 5:45:16 GMT -6
Amazing work on the hood!
|
|
|
|
Post by kronnikracing on Mar 3, 2015 7:26:04 GMT -6
Very cool! What were the pipes from? Seem to fit pretty desent without a whole lot of re-working.
|
|
|
|
Post by ruppman on Mar 3, 2015 9:14:51 GMT -6
Love the hood. Nice work.
|
|
|
|
Post by dacota25d on Mar 3, 2015 21:14:52 GMT -6
Thanks guys. Its definetly a labor of love that's for sure. Hours and hours into it. I actually started the hood in about may and finally got the final coat of clear on it the first week of January.
I have no clue what the pipes were off. I just had them and they fit pretty well with little work. They work OK on the sled but the motor won't Rev over 7000. I've tried different weights and springs but tthat's all I can seem to get out of it but its good enough for the few rides I'll take it on. I won't ever be racing it
|
|
|
|
Post by racingelvis on Mar 4, 2015 23:26:22 GMT -6
nice work dakota, lots of cooool customizing!!!!!
|
|
|
|
Post by Ruppsforever on Mar 5, 2015 15:55:32 GMT -6
Thanks guys. Its definetly a labor of love that's for sure. Hours and hours into it. I actually started the hood in about may and finally got the final coat of clear on it the first week of January. I have no clue what the pipes were off. I just had them and they fit pretty well with little work. They work OK on the sled but the motor won't Rev over 7000. I've tried different weights and springs but tthat's all I can seem to get out of it but its good enough for the few rides I'll take it on. I won't ever be racing it Make darn sure it isn't your tach. I had a brand new tach on a sled and couldn't get it to rev over 8000. Didn't matter what I did with the clutching. Tried another tach and that was the problem. |
|
|
|
Post by dacota25d on Mar 5, 2015 22:26:20 GMT -6
The next part was in my mind one of the more easy parts...Paint!!! this is where I really wanted it to be different and switched the colors. And for the red I also went a little different I did red basecoat then I mixed up some clear and added some red metal flake, a touch of red ghost pearl, and a touch of orange ghost pearl, in the right light at the right angle it has a more orange tint to it from the pearl. it turned out pretty good i think. one of these days ill try and get a pic of the flake. its pretty though to get it on camera though. then the fun of sanding wasnt quite done yet. One more time then the final polish! fresh out of paint ready to sand 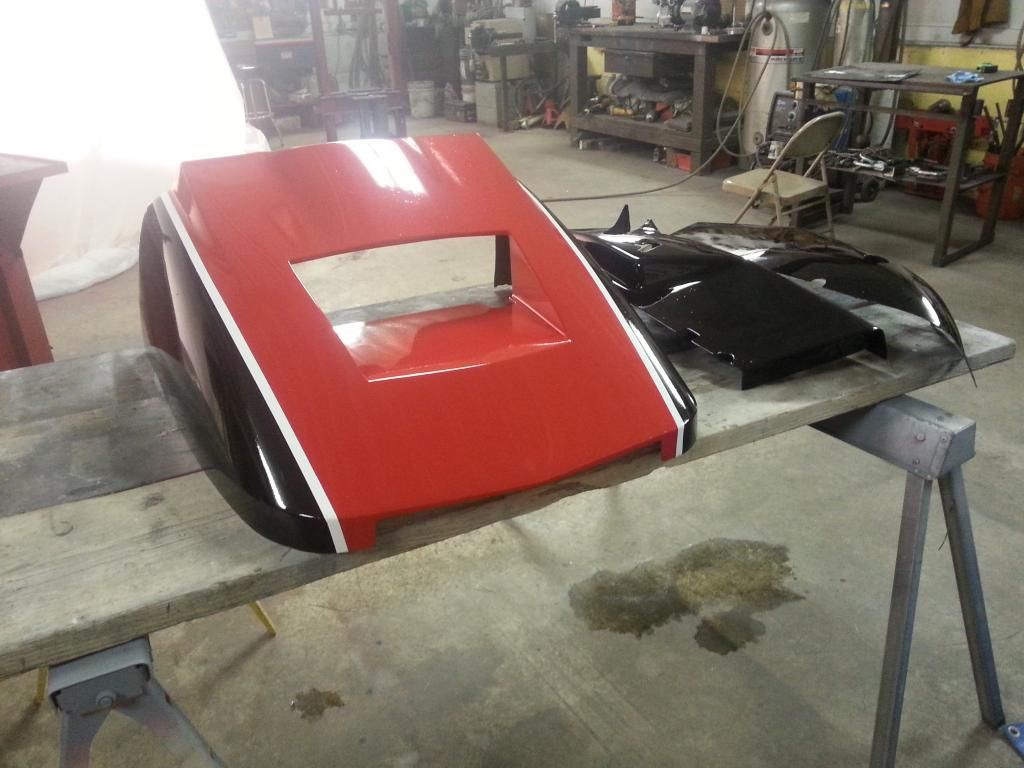 wet sanded ready to polish 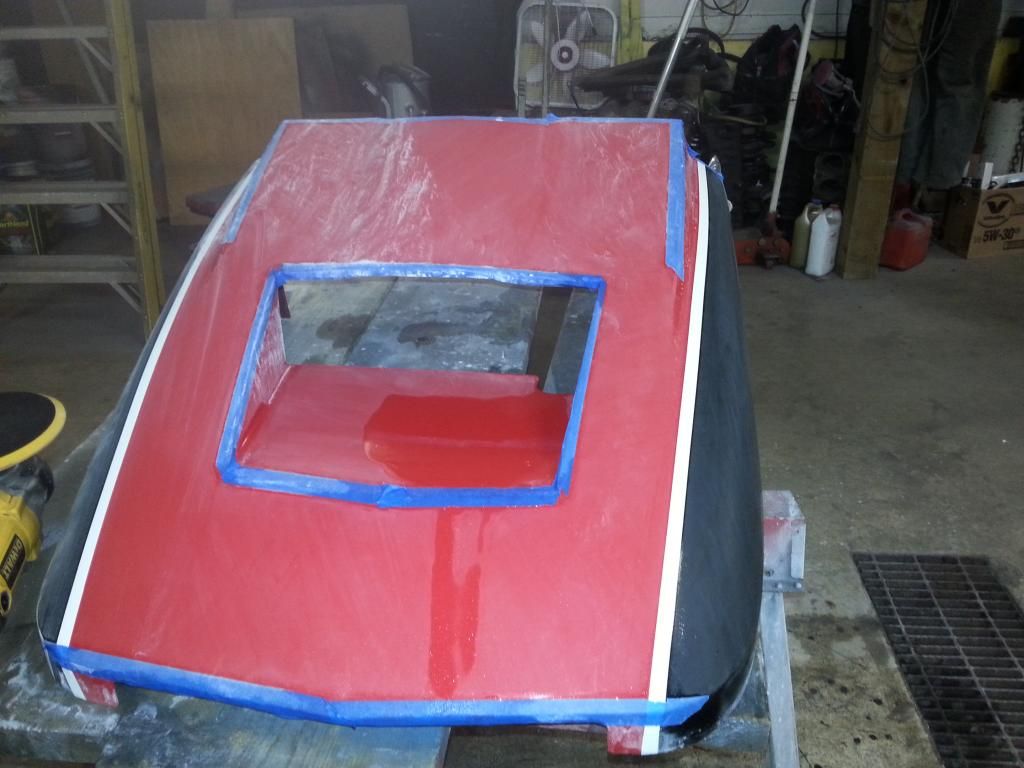 took it out on the maiden voyage a couple weeks ago. She ran great and sure turned alot of heads. 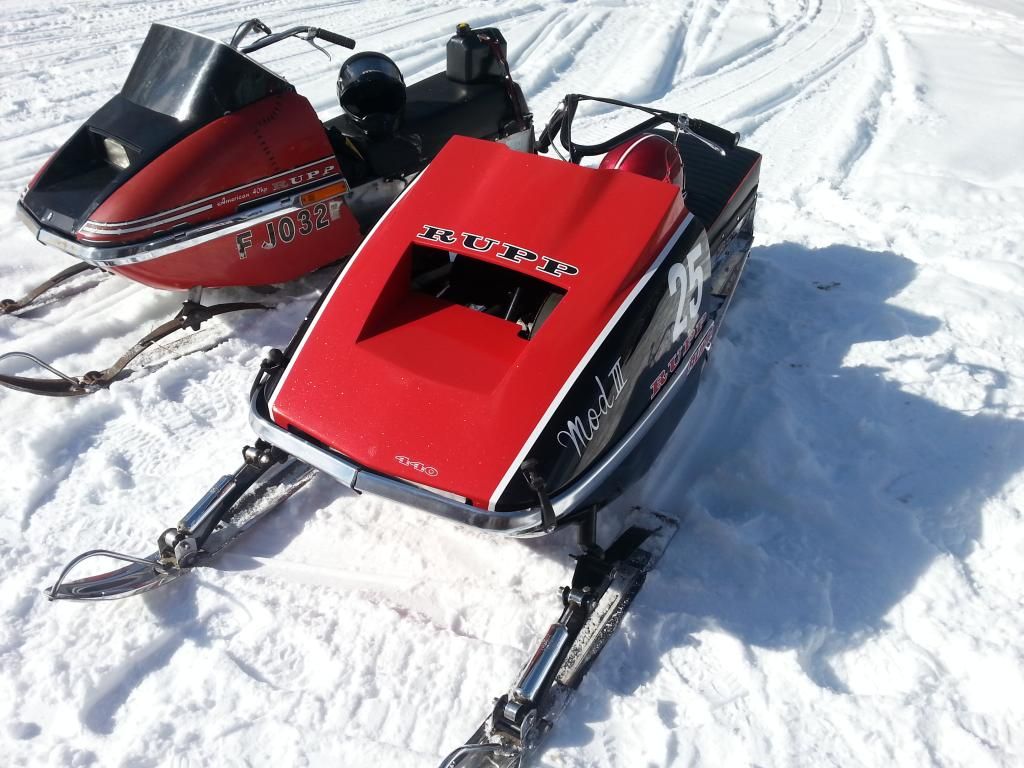 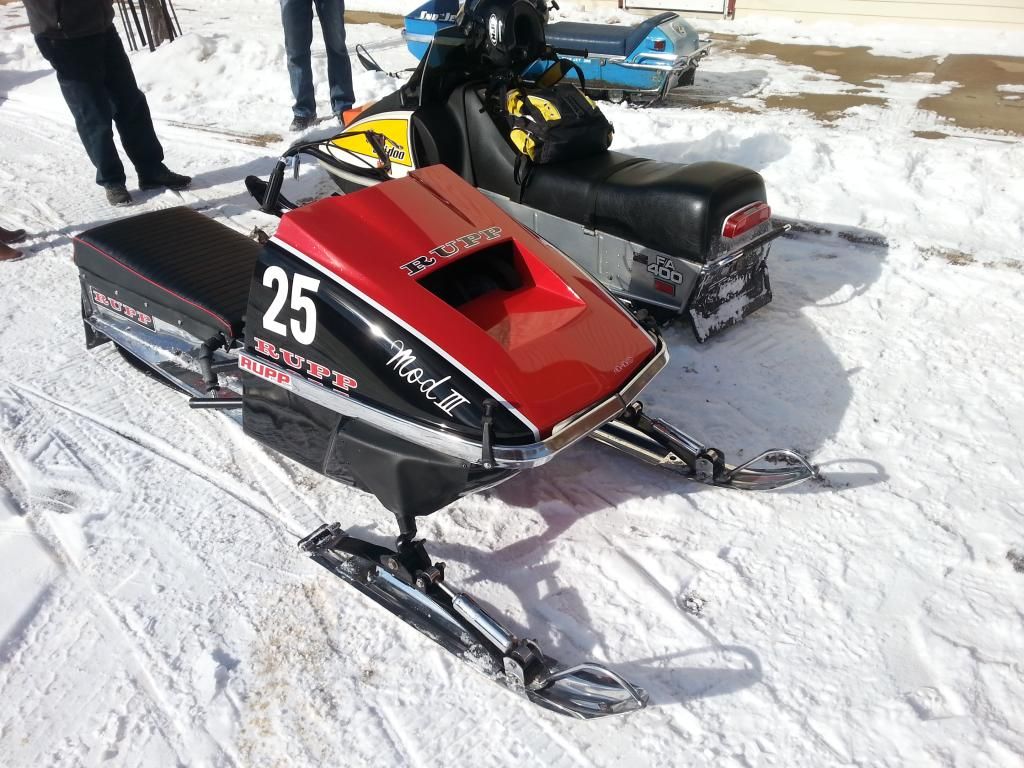 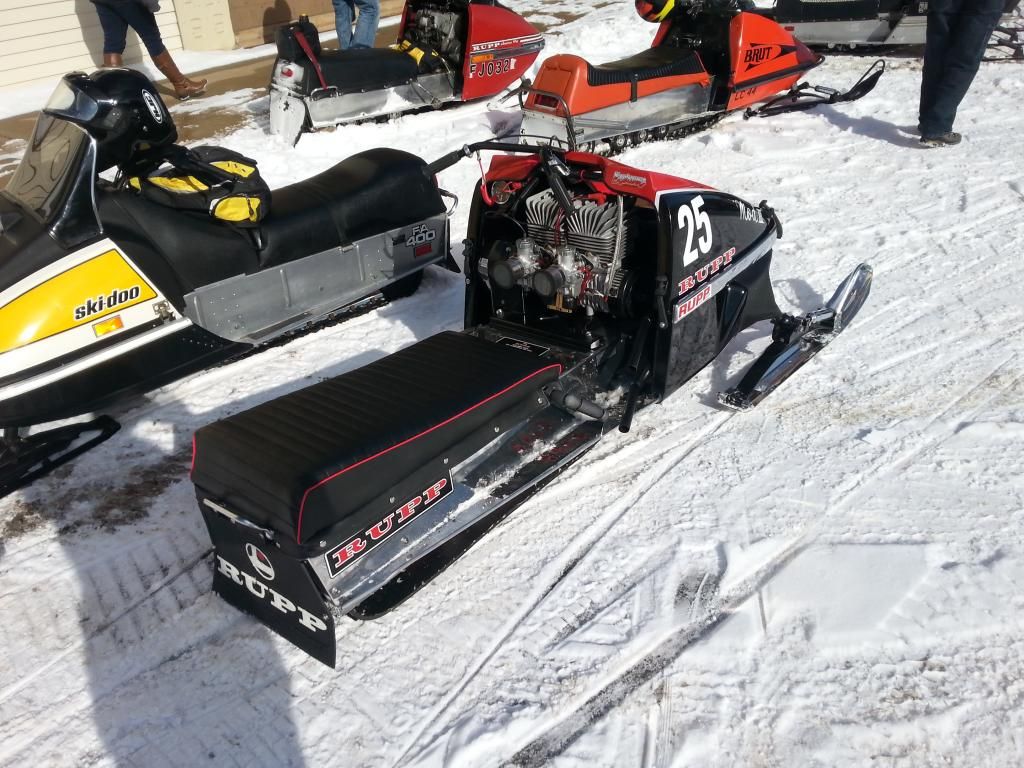 All in all it was a great project. It was fun at times and not so fun at other times. Had a great time meeting everyone at waconia. Thanks Rick for putting on a great event! Now off to the next project  |
|
|
|
Post by dacota25d on Mar 5, 2015 23:23:47 GMT -6
In this pic you can actually see it turns a little orangish 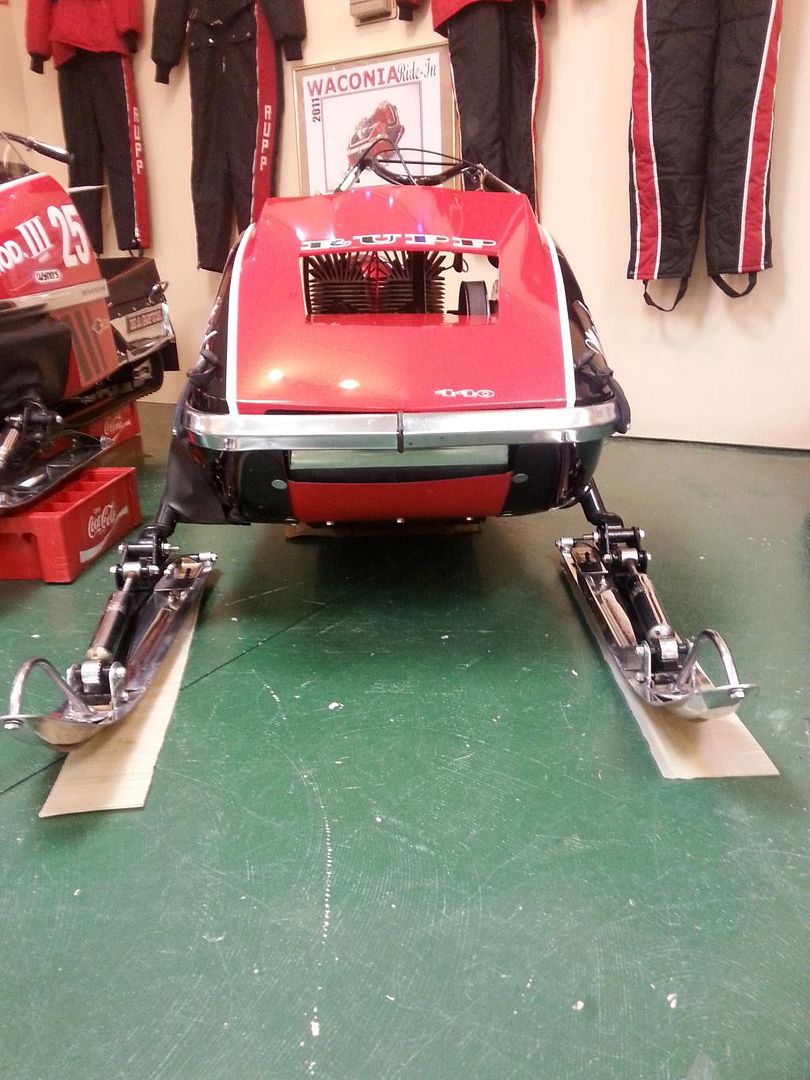 |
|