|
|
Post by bankRUPPt on Mar 16, 2008 15:58:46 GMT -6
Here we go. I've been wanting to get after this restoration for some time. I figured I'd share it all as I went along! My first big task before I could really get into this sled was a hood. The original hood is extremely thin and had damage in numerous areas and the gel coat was all cracked up. Here's a picture of the hood reinforced and plugged off hood for mold building. I painted it Rupp red so I would be able to see any imperfections in the color it was going to be. It was clear coated so I could wet sand and buff it out for a Class A finish need to make a mold from it. 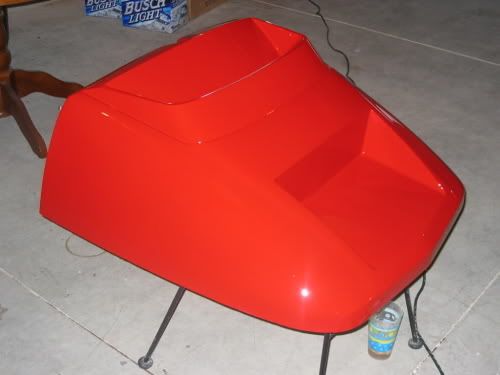 I don't really have any pictures of the mold building or pictures of the layup of the hood. I might make a few more for spares and then put the mold away, I'll try and get a few pictures then. This is the hood fresh out of the mold. It's one hand laid layer of woven roving just like the original. I'll have more pictures of it later after I get the decals done for it and they final paint is done.  With the hood done, I could move on to the engine. This is how it looked to start! 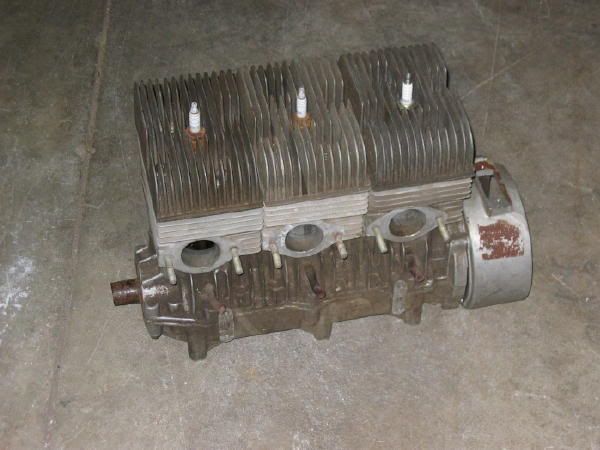 Here it is after I degreased and disassembled it. I took the aluminum and plated steel pieces to Mike Reinbolt at the Cat-Shack. I should have taken pictures of the porting and the bore size. The bore is around 1.5mm smaller than the 440 to make it a 650. New pistons were pretty much out of the question...the engine wasn't available to the consumer, only to Rupp's race department...  Mike used his ReNuzit process on the aluminum. All the original studs, nuts, bolts and washers were plated in yellow chromate. Some of the screws that hold the covers on were zinc plated, along with the steel cover on the mag housing (not installed yet in this pic). 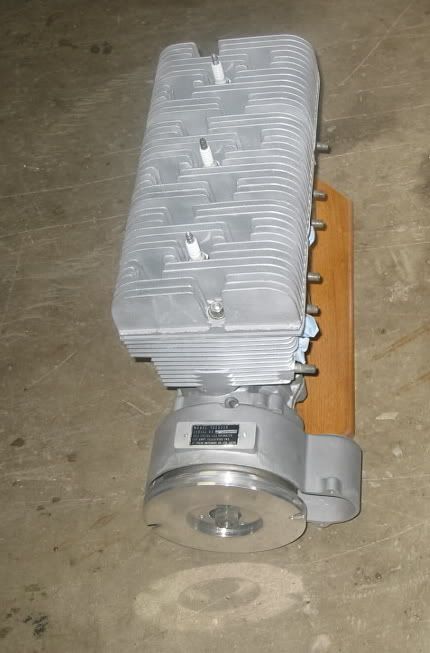 I used powder coat to finish the suspension. I've heard of people having excellent results with powder coat in both finish and durability. Here's the disassembled suspension. It's a bit dusty! We had to do some welding in some areas that was discovered after it was sand blasted. I'm hoping to have finished photos of the suspension next week. 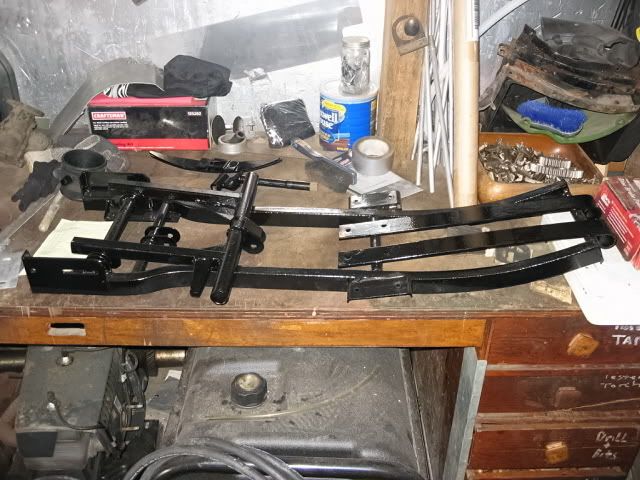 Here's the first steps of progress...The drive shaft! This is the first step in putting the triple back together. I want to get in the drive shaft, track, suspension and skis on so I don't have to flip it over after the engine and handlebar hoop are installed. The aluminum shaft has Brandt's excellent reproduction drivers, NOS idler and new seals and bearings.  Right now I'm just waiting on a few things for the suspension and steering. I hope to have frequent updates! |
|
|
|
Post by snikr on Mar 16, 2008 16:30:53 GMT -6
SWEET. Can't wait for more photos.
Tom
|
|
|
|
Post by alaskaruppguy on Mar 16, 2008 16:36:18 GMT -6
|
|
Dave
Administrator'
{S=0}
Posts: 1,765
|
Post by Dave on Mar 16, 2008 19:14:35 GMT -6
Thanks for the step by step Ed ! It takes some time to put a post like that together ! This is one post i will be watching for the updates.................NICE ! real nice Ed  |
|
|
|
Post by wigman25 on Mar 17, 2008 9:37:54 GMT -6
Ed: Great looking work on a very rare piece! Can't wait to watch it as it goes along. Your glass work looks amazing. This board is the best - it really brings the Rupp people together. Keep it up, lookin good so far. Wig
|
|
|
|
Post by RuppParts on Mar 17, 2008 10:24:26 GMT -6
Ed, Fantastic job! Thank you for sharing in the progress
|
|
magnumforce
Administrator'
{S=0}
NEW EMAIL ADRESS:ruppster@ymail.com Microsoft took away my hotmail account after 12 years, so....
Posts: 1,423
|
Post by magnumforce on Mar 17, 2008 12:17:31 GMT -6
AWESOME!! ;D
|
|
|
|
Post by snosnake on Mar 19, 2008 17:17:00 GMT -6
Hey! lets see the decals man
|
|
|
|
Post by bankRUPPt on Feb 16, 2009 20:16:05 GMT -6
Alright, it's been a while. I jumped into this project not knowing exactly how some things would turn out. After I started to put it together, I found I needed a lot of parts I didn't have! A lot of modifications had to be made to some of the parts. It's nice to have stuff right when it goes out for powder coat the first time  Here's the finished suspension. All the shafts, slides, bumpers, springs, wheels, bearings and shock are new. It took some time to track down a set of rear wheels that weren't already turning red. Any of the plated hardware is also NOS. 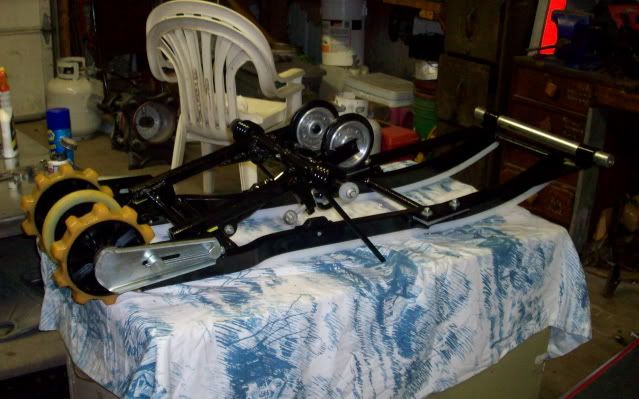 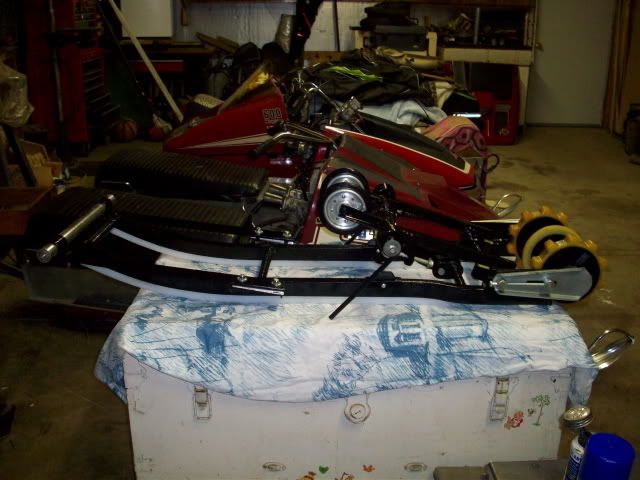 Here it is a few hours later! I couldn't resist, I had to thow the seat on the foam to see how it looked! The seat was custom made from Intech Graphics. 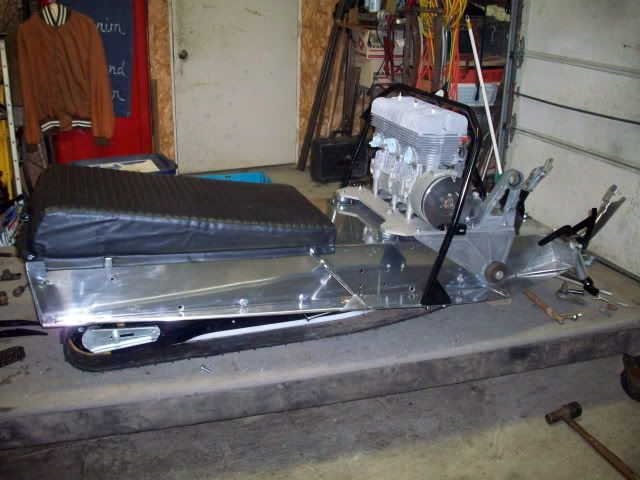 The engine plate take a pretty good variety of nuts and bolts to put it together correctly. Luckily, Dad has plenty of this stuff inventoried in drawers!!! All fasteners are OEM style where at all possible. 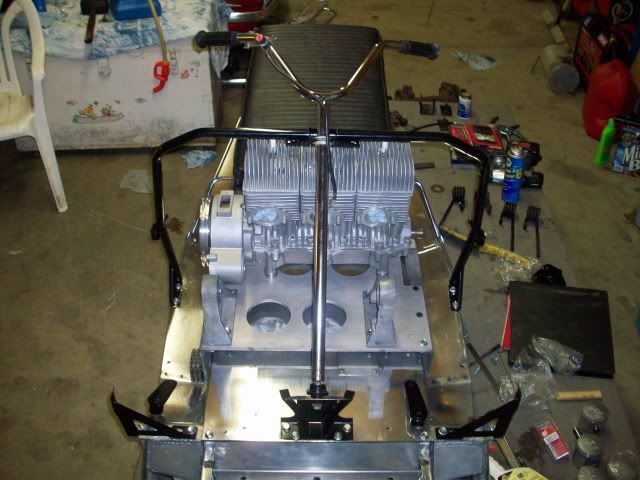 I don't know about the stock chrome handlebars yet. Might go with more of a racing style? Stay tuned! |
|
|
|
Post by Ruppsforever on Feb 16, 2009 21:15:57 GMT -6
AWESOME !!!!!!! Its always a good thing when Dad's have alot of stuff laying around isn't it ?? I go to great lengths to make stuff correct... unless its something we're racing.
Get that thing done !!!!!!
|
|
|
|
Post by snikr on Feb 17, 2009 11:52:34 GMT -6
Looks great so far. Can't to see and hear it when you are done. Tom
|
|
|
|
Post by magnumrt on Feb 17, 2009 16:10:28 GMT -6
Looking good, if you get bored with it, I could find it a good home....lol
|
|
|
|
Post by bankRUPPt on Feb 17, 2009 18:52:28 GMT -6
Thanks, guys. I don't know -rt, I think it likes it where it is!!! Anyway, on to one of the biggest set backs of the project. There's no way I could finish it if I couldn't hear it run. And I was lacking an ignition. It was a happy and sad day all together, it was a shame to tear the bags open on the stator, flywheel and ignition. But now we have FIRE!!! I did have an option of fitting a newer ignition, but to find this stuff NOS saved a lot of work...(but probably cost me some extra bucks  ) 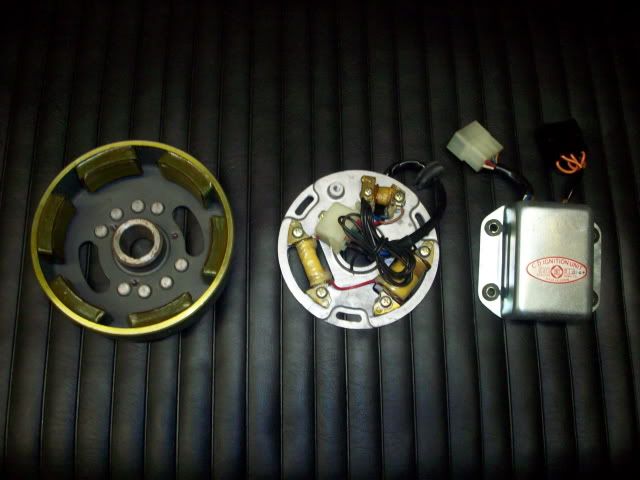 Kinda jumping all over here, I just work on stuff as I come to it. The chain tensioner shaft was broken where the cotter pin goes through the castle nut. Lucky for me, dad had an NOS shaft and the bearings to spruce it up... 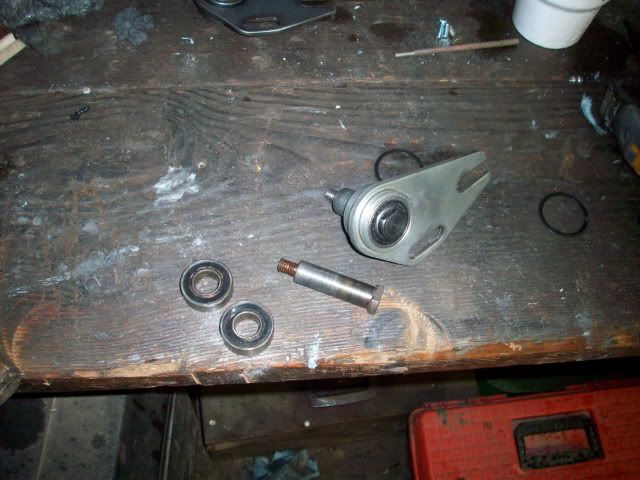 Last thing I got done today was test fitting the bumpers to the hood. All the extra bracing we did when making the plug and the mold paid off! The hood fits the bumpers PERFECT. I'm guessing it's possible these hoods fit better than the original. I didn't quite finish up, this was a test fit and it will come back apart until I finish the steering and drive-line. And you can see I did start on the steering today. Cleaning the springs and skis took up most of my day, they had been spray painted black. 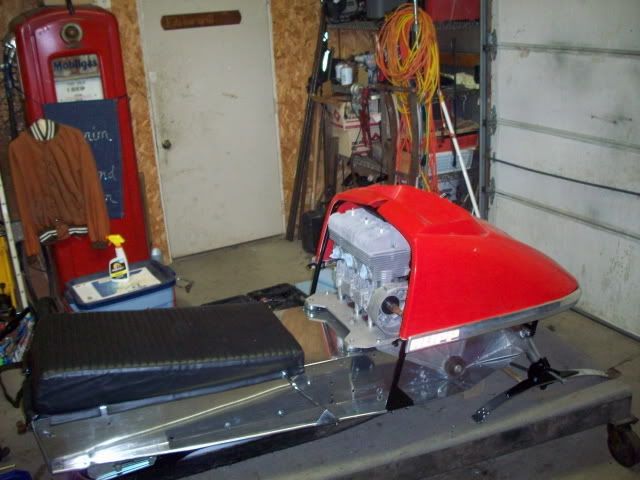 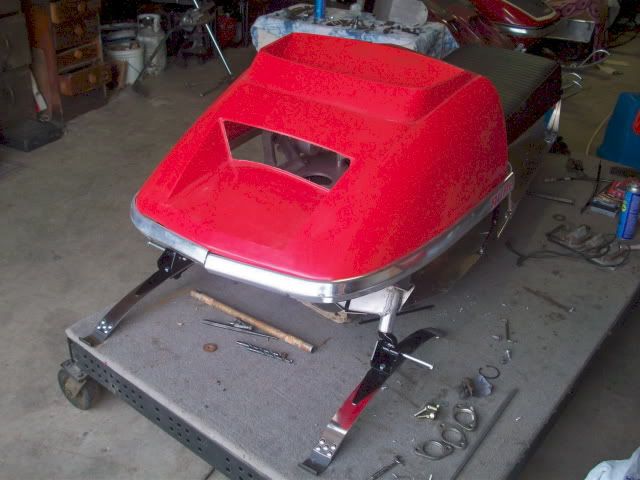 The hood in the pix is just a test hood, I made it WAY to thin. Just like the original! Unfortunately, it's already broken up like the original. So we might get pics of the lay-up of the hood after all. |
|
|
|
Post by bankRUPPt on Feb 18, 2009 18:13:09 GMT -6
More progress today. I finished fitting the bumpers, hood and lowers and all the brackets are tightened. Also finished up the skis and put them on. 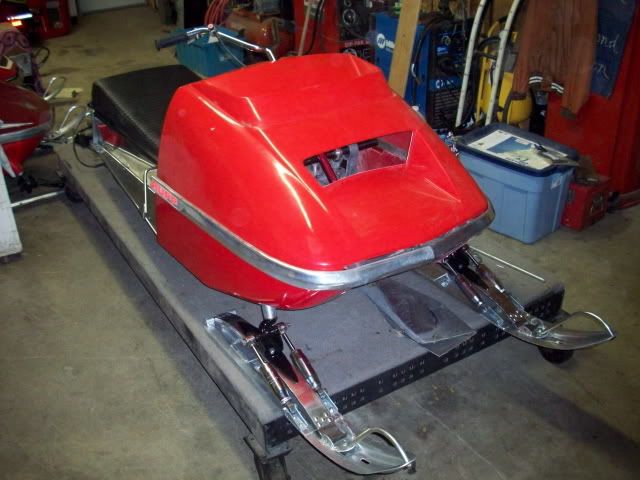 Now I'm working on getting the jackshaft in. I got the new bearings in the towers and am aligning the gears. Tomorrow when the brake rotor is done I can put it in and lock it in place with the eccentric collar. The jackshaft wasn't originally painted, but had some type of finish on it. I tried to replicate the finish with what I thought it was and may have guessed right, it looks pretty good. 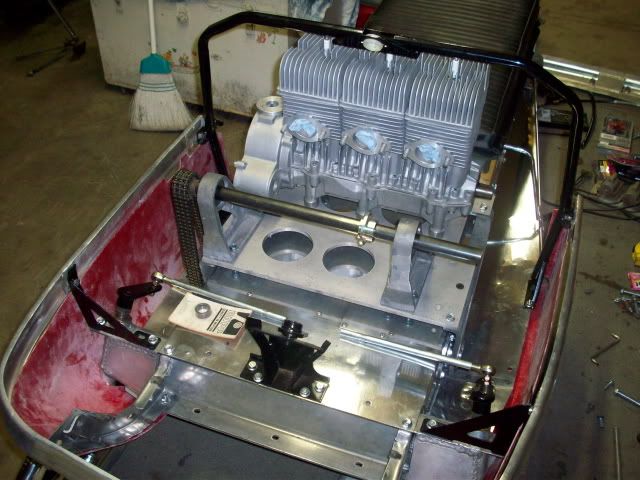 The 71 performance bulletins suggested adding a 3rd jackshaft tower and a stabilizer from the drive to driven clutch. Some may wonder why not on the more powerful 72? Originally it would have. The problem I ran into is that my pipes would not clear the middle tower. So for now this is the set up I'm using. I kind of doubt I'll be racing it much anyway. Here's is a pic of the original jackshaft set up. 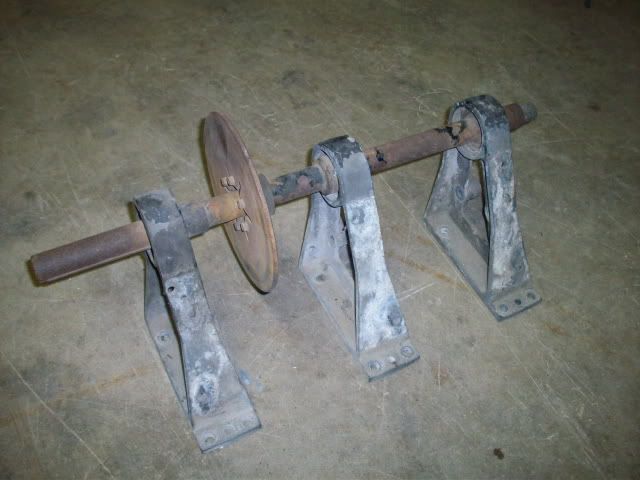 That's it for today. I did get a pic of one of the next Rupp projects. 71 400 Magnum......Yes, that's a free air  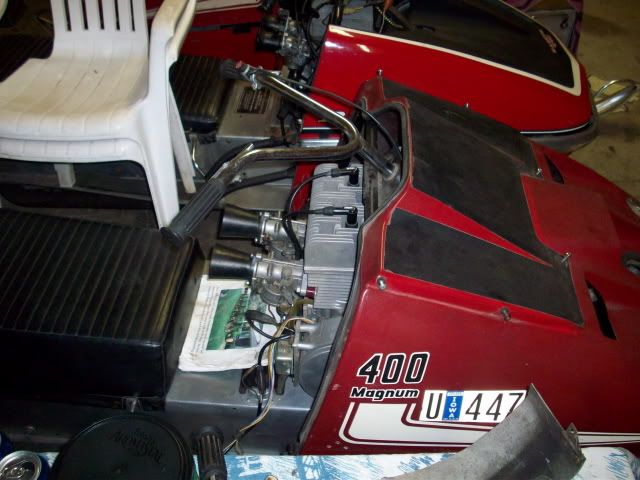 |
|
|
|
Post by racingelvis on Feb 18, 2009 21:46:38 GMT -6
excellent ed!! i love it. i have a 73 magnum 400 f/a. dont know if you guys saw that when you were her or not. talk to you soon. b.s.
|
|
|
|
Post by bankRUPPt on Feb 18, 2009 21:54:00 GMT -6
Thanks, Bill.
The 400...I think you've showed it to my dad. Same configuration, both cylinders take a mag side jug? He mentioned it when I found this one....
|
|
magnumforce
Administrator'
{S=0}
NEW EMAIL ADRESS:ruppster@ymail.com Microsoft took away my hotmail account after 12 years, so....
Posts: 1,423
|
Post by magnumforce on Feb 18, 2009 23:25:03 GMT -6
Lookeen good!!!
She's coming along nicely, thanks for the updates!!!
|
|
|
|
Post by rupprally on Feb 20, 2009 8:42:37 GMT -6
looking good, keep up the good work.
|
|
|
|
Post by Rupp440 on Feb 20, 2009 19:07:22 GMT -6
looking real good can't wait to hear that fire up wont be long at the pace you got going!!
|
|
|
|
Post by bankRUPPt on Feb 24, 2009 18:13:35 GMT -6
Progress has slowed a little bit! I had an issue with the drive shaft. So it had to come back out, the track wasn't centered in the tunnel and I didn't notice it, I had to relocate the chain side bearing a little. It's all back together now, I have the jack lined up and the collars on. I sandblasted and resurfaced the brake rotor, it was pretty rough from sitting. And I made the handlebar hoop support and put it on so I can fit the pipes around it.  As the project goes along, I notice the reflection of stuff in the aluminum. That wasn't me! MagnumEd spent the time to shine up the tunnel for me. The engine plate, side plates and jack shaft towers are magnesium. They're extremely light. The bad part is that they corrode very easily. At least for now, the stuff is clean! 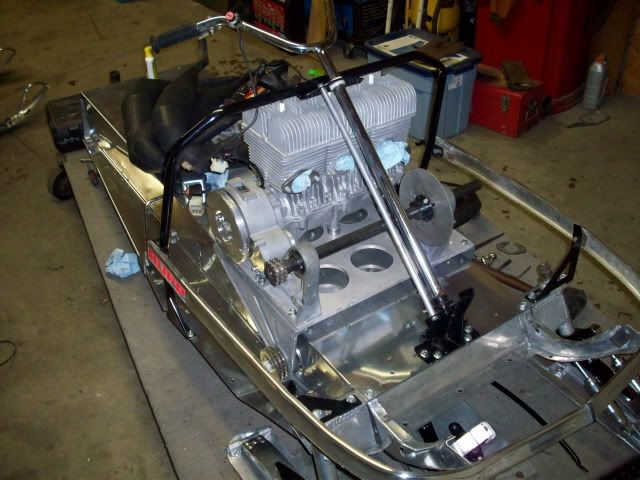 In this pic I'm testing the fit of the pipes to make sure they're clearing the hood by enough. I'm using a set of pipes we had Loren Machart make. For lack of anything else that will fit, I had to use the 71 600 Magnum pattern. I had to make new header pipes, the 600 exhaust ports are quite different than the 650. I'm also making the coil / CDI box plate. Unlike the 600, the 650 has no provisions to mount the CDI. I don't have the original 650 coil plate, so I had to make it. You can see I have the flywheel and stator in now. 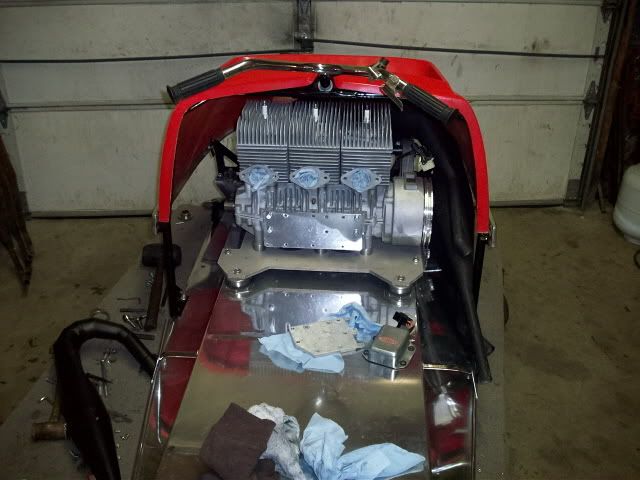 I'm just waiting for a few supplies to come in. If the gel coat for the hood comes, I'd like to make the hood next week. I'm going to try doing the center in black gel and the outer areas in red. From what I can tell, the original was made like this. Then I'll be able to show off the cool graphics package that Bill @ Intech made up for me  |
|


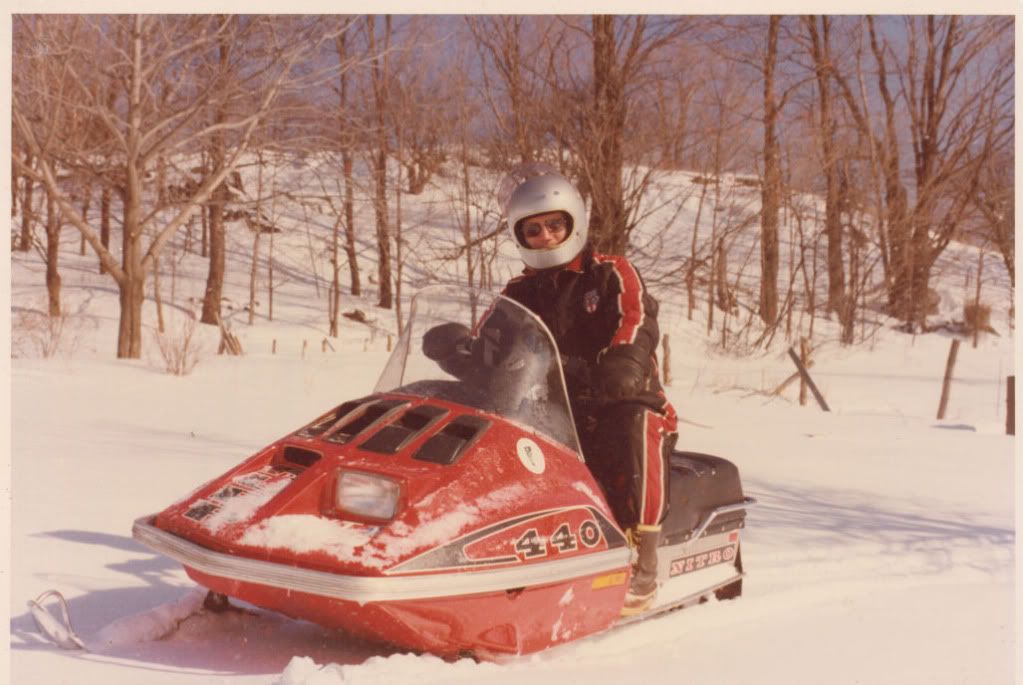
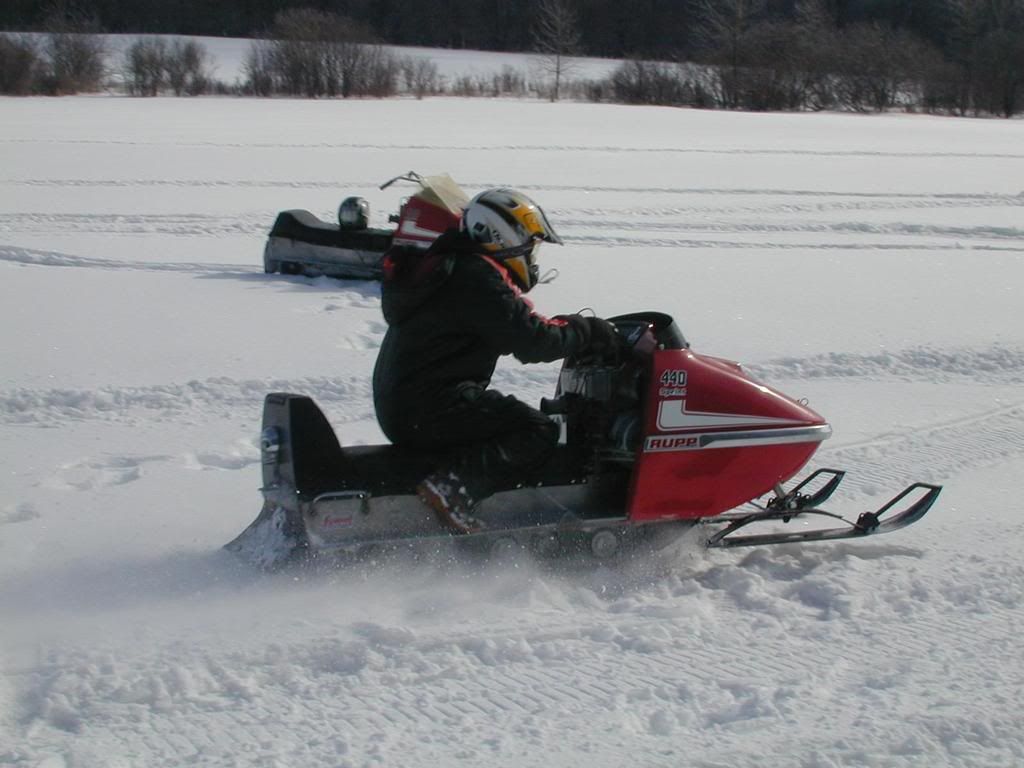


 )
)


